Perspective Grid Overlay for Photos
Drop a reference photo under the grid and match the vanishing points to the real edges in the picture. Then trace over it, or export the matched grid as a transparent layer.
- Upload, drag & drop or paste
- Find vanishing points from edges
- Photos stay on your device
Add a photo with the Upload photo button, by dragging it onto the canvas or by pasting it. Then press Match grid to photo and drag the coloured lines onto edges in the picture.
How to overlay a perspective grid on a photo
- Add your photoClick Upload photo, drag an image onto the canvas, or paste one with Ctrl/⌘+V. The canvas takes the exact shape of the photo. The street sample shown first is already matched, so you can see the result before using your own.
- Pick the perspective typeChoose 1-Point for a straight-on view, 2-Point for a building corner, or 3-Point when the verticals in the photo lean toward each other.
- Match the grid to the photoPress "Match grid to photo". Drag the ends of each coloured line pair onto two edges that run toward the same vanishing point. The grid snaps to where each pair crosses.
- Fine-tune and exportDrag the round handles to adjust, fade the photo with Photo opacity, then export the grid as a transparent PNG, SVG or PDF to trace over.
How vanishing-point matching works
Edges that are parallel in the real world, like the top and bottom of a row of windows, meet at a single point in a photo. That point is a vanishing point. Each coloured pair of lines in the tool marks two such edges; where the pair crosses, the tool places the matching vanishing point and redraws the grid.
| Mode | Line pairs | Put them on |
|---|---|---|
| 1-Point | Red | Two edges running into the picture: floor–wall joints, road edges, rails |
| 2-Point | Red, teal | Horizontal edges of the left face (red) and the right face (teal) of a building or room corner |
| 3-Point | Red, teal, purple | As 2-point, plus two vertical edges (purple) that lean toward each other |
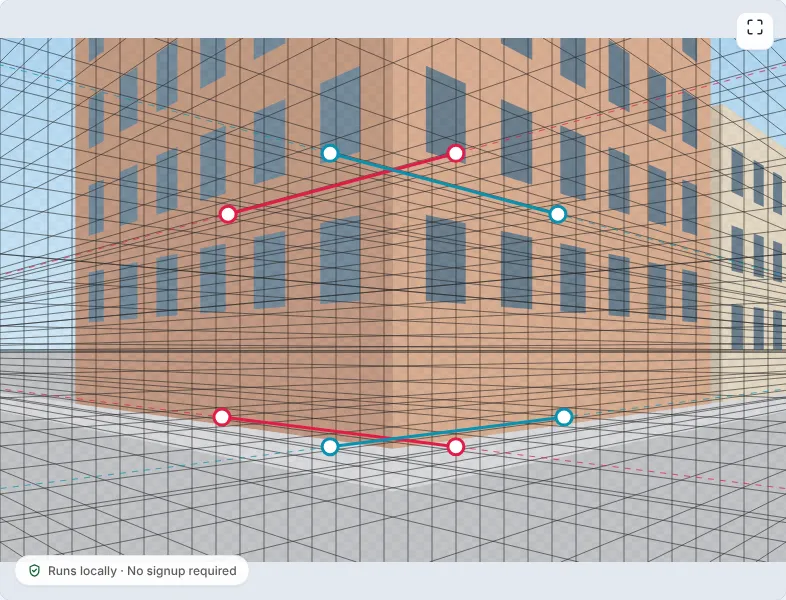
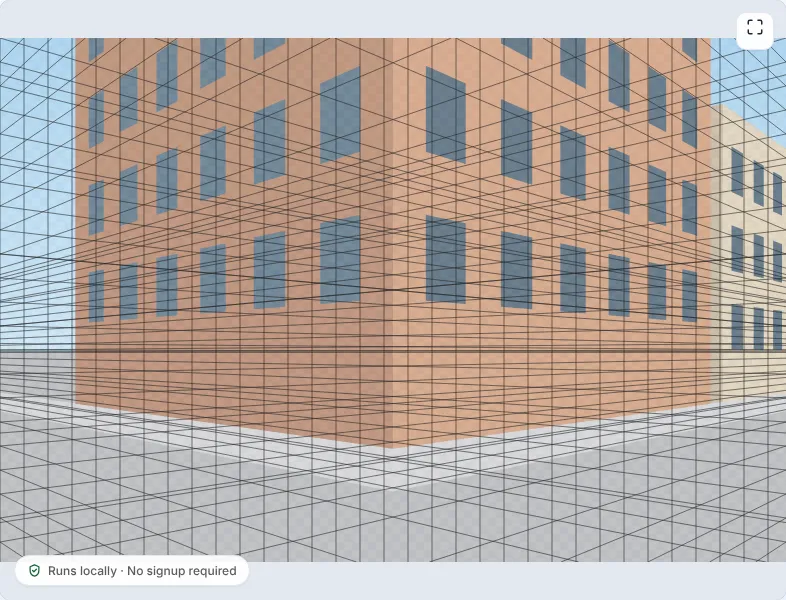
In 1 and 2-point mode the horizon is set from the crossings automatically. In 5-point (fisheye) mode, place the handles over the photo by hand instead.
Your photos stay private
Reference photos are often of your home, your street or client work. This tool never uploads them: the image is read by your own browser, shown on the canvas, and discarded when you leave the page. Nothing about the photo is stored in the share link either; only the grid settings are.
FAQ
Is my photo uploaded anywhere?
No. The photo is opened directly by your browser and stays on your device. It is not sent to our server or to any third party, and it is gone when you close or reload the page.
Which edges should I use to find the vanishing points?
Long, straight edges that are parallel in the real world: rooflines, window rows, floor tiles, kerbs, shelf edges. Use edges that are far apart in the photo for the most accurate crossing point.
Why does the grid not line up perfectly?
Phone lenses add some barrel distortion, especially near the edges, and slightly tilted edges add error. Use edges near the middle of the photo and adjust by dragging the handles.
Does the exported grid include the photo?
The export contains the grid only, so you can place it on its own layer above your photo or drawing. Your photo never leaves your device.
Which image formats can I use?
Any image your browser can open: JPG, PNG, WebP and GIF everywhere, plus HEIC in Safari. Very large photos are scaled to at most 4096 px on the long edge for the canvas.