How to Find Vanishing Points in a Photo
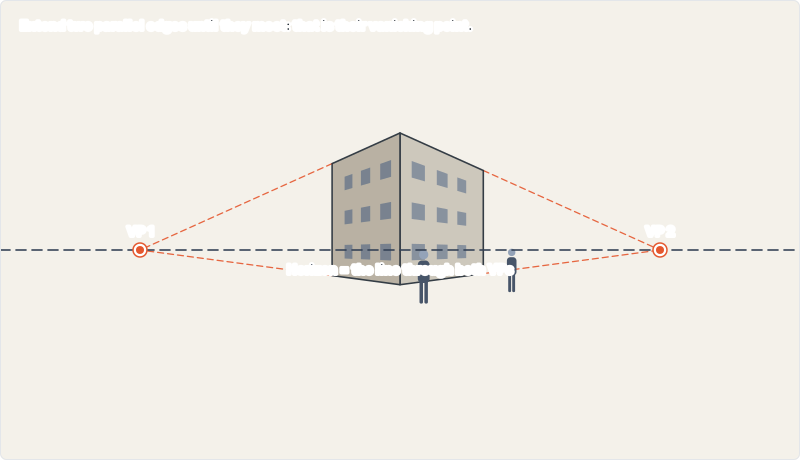
Pick two edges that are parallel in the real world, extend them until they meet, and you have found their vanishing point. Repeat for a second direction, and the line through both points is the horizon.
In short
- Shortcut: the overlay tool finds the points from two dragged lines per direction.
- Choose long, straight, clearly parallel edges.
- Two edges per direction are enough; a third confirms.
- The horizon passes through the vanishing points of all level directions.
- Use the result to set up a matching grid before you draw.
Steps
- Import the photo. Open it in a drawing app or print it.
- Pick a direction. Find two edges that are parallel in reality, such as the top and bottom of a wall.
- Extend them. Draw straight lines along both edges until they meet. That is one vanishing point.
- Repeat for a second direction. Do the same with the other face of the building.
- Draw the horizon. Connect the two vanishing points. It should pass near the eye height of people standing in the photo.
Pitfalls
- Lens distortion: wide-angle phone photos bend straight lines near the edges. Use edges close to the centre.
- Edges that are not really parallel: roads curve, old buildings lean. Pick crisp architectural lines.
- Vertical lines that converge: the camera was tilted. You are in three-point perspective; find a third point the same way.
Match a grid to the photo in the browser
You do not have to draw the construction lines by hand. The perspective grid overlay tool does the extending and intersecting for you:
- Add the photo. Click Upload photo, drag the image onto the canvas, or paste it with Ctrl/⌘+V. The canvas takes the photo's exact proportions. The photo is processed in your browser and is not uploaded.
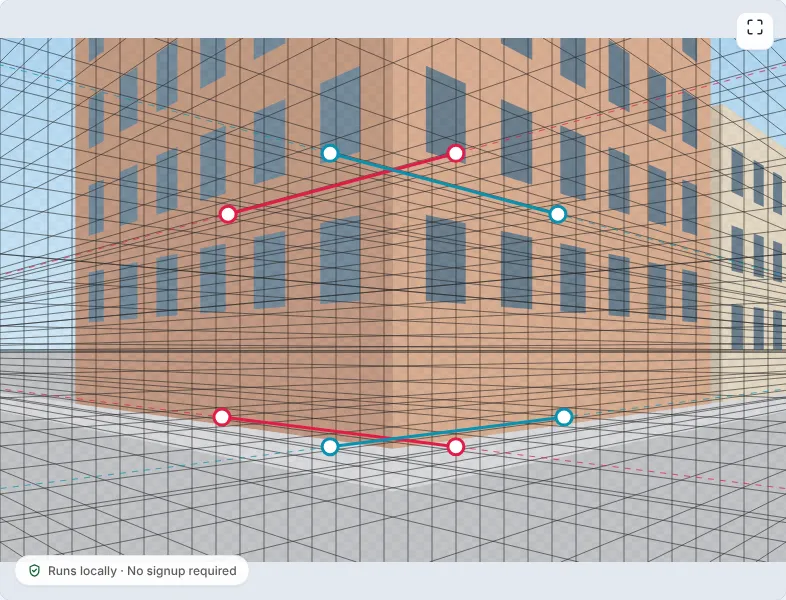
- Choose the mode. 2-Point for a building corner like the one below; 1-Point if one set of edges runs straight into the picture; 3-Point if the verticals lean.
- Press "Match grid to photo". A red and a teal pair of lines appear. Drag the four ends of the red pair onto the top and bottom edges of the left face, and the teal pair onto the right face.
- Check the result. The grid redraws with each vanishing point at the crossing of its pair, and the horizon through both. Press Done matching, fade the photo with Photo opacity, and export the grid as a transparent PNG.
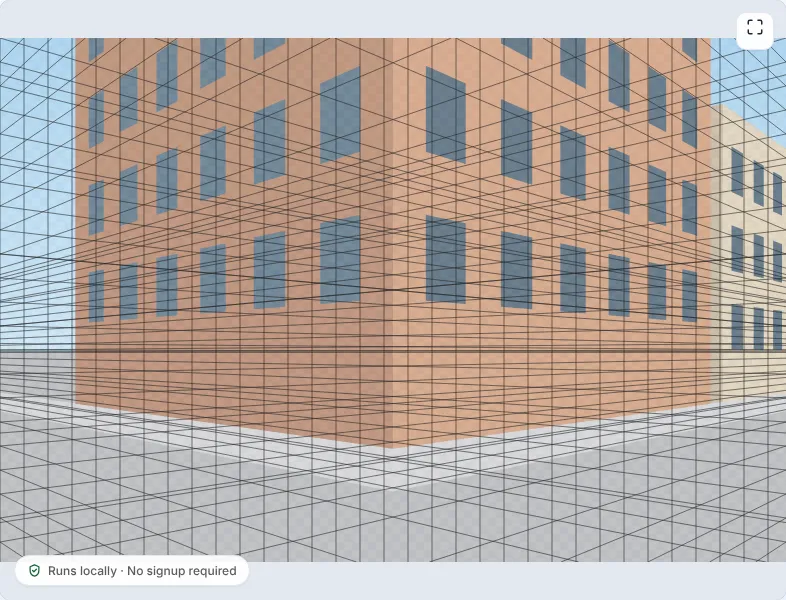
The numbers in the caption are reusable: open this exact grid and draw new buildings on the same street that agree with the photo.
Frequently asked questions
What if the lines never meet on the page?
The vanishing point is far away. Add margin around the image or extend the canvas.
What if there is only one vanishing point?
The photo is in one-point perspective; the horizon is the horizontal line through that point.